Marine environments expose railing hardware to failure patterns that rarely show up immediately. Salt-laden air deposits chloride into crevices that a basic rinse never reaches, and the damage initiated at those points—thread binding, pitting under clamp faces, corrosion at post bases—only becomes visible months later when remediation is significantly more difficult. The cleaning products and tools that appear to make the job faster often make it worse: iron contamination from wire brushes, chloride attack from bleach-based cleaners, and ammonia-bearing glass cleaners running off onto exposed hardware each contribute to accelerated surface degradation. Getting cleaning right in a marine context means understanding where salt actually hides, what it takes to remove it without compounding the problem, and what the work is not finished until.
Salt Retention Points in Cable and Glass Hardware
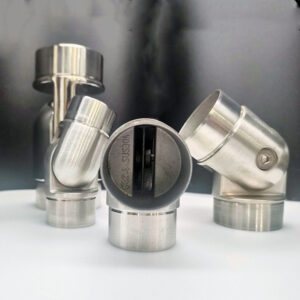
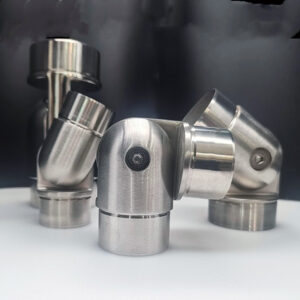
The surface finish on most architectural railing hardware is the first place salt accumulates in ways that aren’t obvious on inspection. Satin-finished stainless—the standard brushed appearance on cable terminals, post caps, spigots, and glass clamps—carries a texture that is inherently more porous at the microscopic level than a polished surface of the same 316 grade. That porosity means salt particles deposited by spray or condensation lodge in the surface grain rather than washing away with the next rain event. This is a characteristic of the finish, not a grade deficiency, but it does mean that routine rinsing of open surfaces leaves salt behind in the texture itself.
Satin-finished 316 retains salt in its grain where polished surfaces of the same grade would not—this changes the threshold for adequate cleaning.
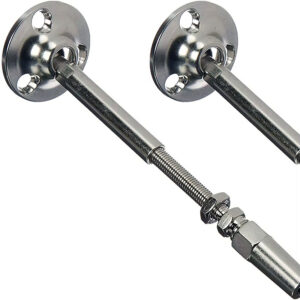
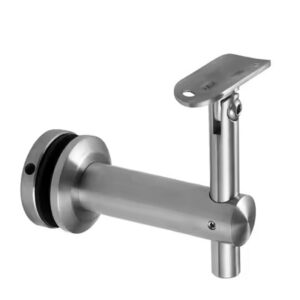
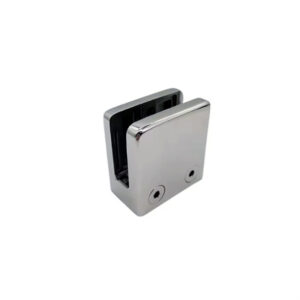
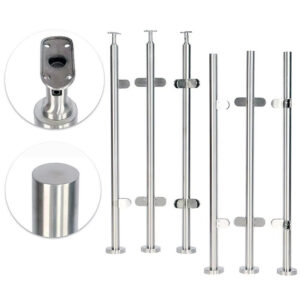
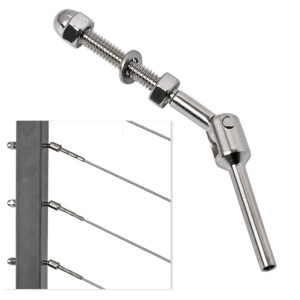
The more consequential retention zones are the ones that get no rinsing contact at all: threaded cable terminal ends, the interior gaps of glass clamps where the fitting meets the glass edge, and post base joints where water pools before evaporating. These are locations where salt concentrations can build over multiple wetting cycles without any disturbance. Tea staining—the light brown surface discoloration that develops before pitting begins—is the visible diagnostic sign that those deposits have reached a threshold where the passive layer is being challenged. Treat it as a prompt to inspect the retention zones the table below identifies, not as a sign that failure is already underway.
| Retention Zone | Why Salt Lingers | What to Inspect |
|---|---|---|
| Satin‑finished surfaces | Brushed texture is more porous than polished; traps salt micro‑crevices | Early tea staining (light brown discoloration) |
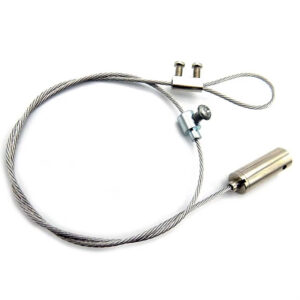
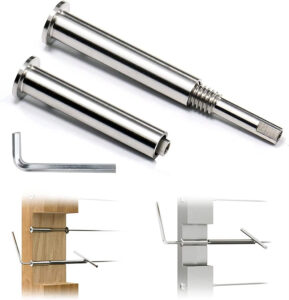
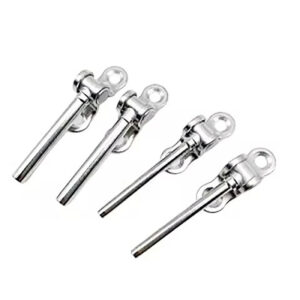
| Cable terminals and threaded fasteners | Small joints and threads shield salt from rinsing | Discoloration, pitting initiation, thread binding |
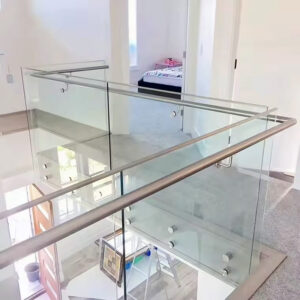
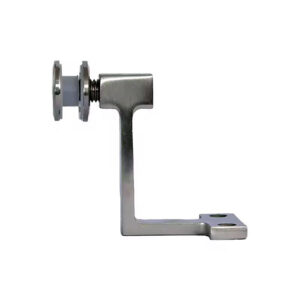
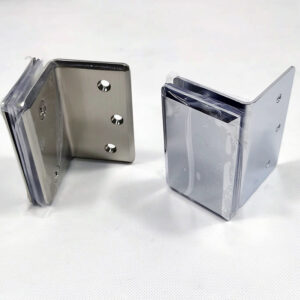
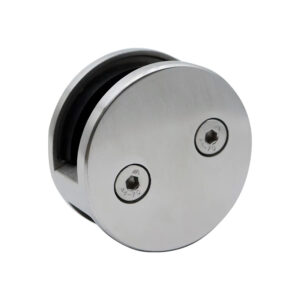
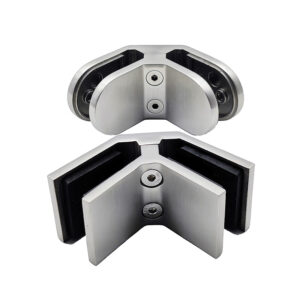
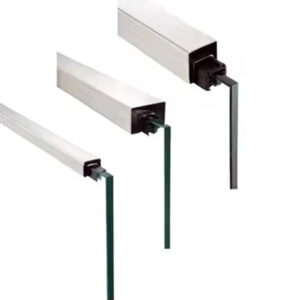
| Glass clamp crevices | Enclosed clamp‑to‑glass gaps retain moisture and deposits | Residue film behind clamp faces, staining at edges |
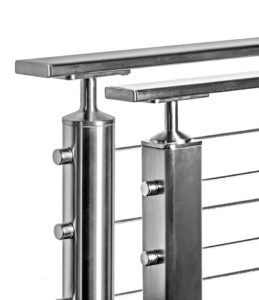
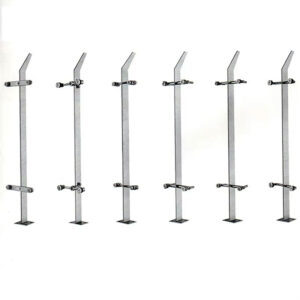
| Post bases and mounting joints | Low‑point water pooling and debris accumulation | Corrosion start points, hidden debris buildup |
| Scratched or scuffed areas | Broken passive layer exposes fresh steel, traps chloride | Rust spots forming in scratch lines |
Where tea staining is found at hidden retention zones such as thread roots or clamp interiors during an open-surface visual check, that pattern indicates salt has migrated further into the assembly than the visible surface suggests. That condition is the appropriate trigger for disassembly-level cleaning rather than a routine surface wipe.
Cleaning Products and Tools That Damage Stainless
The passive chromium oxide layer that gives Roestvrij staal 316 its corrosion resistance in marine exposure is chemically thin and mechanically soft relative to the steel beneath it. Both mechanical abrasion from the wrong tools and chemical attack from incompatible cleaners can disrupt it in ways that remain invisible until corrosion initiates at the compromised point weeks or months later.
The mechanical risk comes from iron contamination. Steel wool, wire brushes, and carbon-steel tools leave ferrous particles embedded in the stainless surface. Those particles oxidize independently and create rust initiation sites that appear to be stainless steel corrosion but are actually iron contamination. In a marine environment where chloride is already present, that contamination accelerates surface degradation significantly. The prohibition against these tools is backed by manufacturer guidance and should be treated as a hard exclusion, not a preference.
The chemical risks are distinct but similarly definitive. Bleach and chlorine-based cleaners attack the passive layer directly, initiating pitting that becomes irreversible if the cleaner is left in contact or used repeatedly. Mineral acid cleaners etch the surface. Neither is appropriate for stainless hardware regardless of concentration or contact time. Before using any commercial cleaner on 316 hardware in a marine setting, confirm the formulation is pH-neutral and explicitly rated as stainless-safe—do not rely on the product being labeled for metal cleaning generally.
| Product / Tool | Damage Mechanism | What to Avoid or Confirm |
|---|---|---|
| Steel wool, wire brushes, carbon‑steel tools | Leave iron particles on stainless; those particles rust and initiate surface corrosion | Never use on 316 stainless hardware |
| Bleach or chlorine‑based cleaners | Attack the passive chromium oxide layer, triggering pitting and staining | Exclude all chlorine‑containing formulations |
| Mineral acid cleaners | Etch and chemically erode the surface | Confirm any cleaner is pH‑neutral and stainless‑safe |
| Harsh abrasive pads or pastes | Scratch the grain, embed contaminants, and trap chloride in new grooves | Use only soft pads with mild abrasive; always follow the metal grain |
Where tea staining is already present on satin-finished surfaces, the appropriate remedy is a mild abrasive cleaner applied with a soft pad, worked in the direction of the metal grain. This is a commercial practice applicable to satin finishes in coastal marine maintenance, not a general stainless cleaning rule for all surface conditions or grades. Cross-grain abrasion creates new scratch channels that trap chloride, so grain direction is not optional. The abrasive should be the mildest formulation that is effective, since the goal is to remove the surface contamination without deepening the finish texture.
Disassembly Access Versus In-Place Maintenance
The decision between disassembling hardware for cleaning versus cleaning in place comes down to where the salt actually is, not how long ago the last service was.
In-place cleaning—rinsing, wiping exposed surfaces, working a soft brush into accessible gaps—handles open surfaces well and can be completed quickly. It is the appropriate approach when hardware is generally clean, tea staining is absent, and there is no evidence of thread binding or deposit buildup at clamp faces. The limitation is access: a rinse-and-wipe cannot reach the interior of a cable terminal thread, the recessed gap behind a glass clamp face, or the underside of a post base plate. Deposits left in those locations continue to concentrate chloride between service visits.
| Benadering | Access to Crevices | Labor and Time | Risk of Residual Salt | Typical Decision Basis |
|---|---|---|---|---|
| Disassembly cleaning | Full access to threads, clamp interiors, and concealed joints | Higher; requires removal and reassembly | Minimal if all parts are cleaned and dried | Periodic deep clean or visible tea staining at hidden points |
| In‑place maintenance | Limited; rinse and wipe cannot reach all enclosed gaps | Lower; faster routine service | Possible deposits remain behind fittings and under clamps | Frequent light maintenance where hardware is generally clean |
Disassembly provides full access to thread roots, clamp interiors, and concealed joints—the zones that initiate crevice corrosion when left unaddressed. The labour cost is higher, and the reassembly step introduces its own risk if threads are not cleaned and reassembled correctly. The appropriate trigger for disassembly-level cleaning is evidence-based: visible tea staining at a hidden point during a routine check, thread binding on adjustment hardware, or residue visible at clamp faces after in-place cleaning. A fixed time-based schedule is less reliable than using those visual indicators to decide when in-place maintenance is no longer sufficient.
If tea staining appears behind fittings that are not accessible in place, in-place cleaning has already fallen short of what the hardware needs.
The long-term consequence of repeatedly choosing in-place speed over disassembly when deposits are accumulating is crevice corrosion that has been allowed to progress through multiple service cycles before it becomes visible. By the time external pitting or staining appears at a concealed joint, the hardware may require replacement rather than cleaning.
Runoff Interaction Between Glass and Metal Cleaners
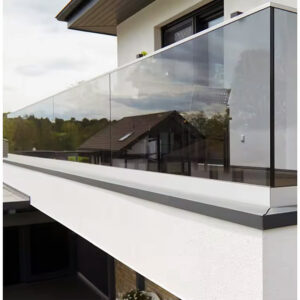
Glass and metal cleaners are typically applied in proximity on balustrade and railing assemblies—glass panels are cleaned from above, and runoff travels directly across glass clamps, handrail brackets, and post surfaces. The compatibility risk is not theoretical, but it also cannot be quantified without knowing the specific formulations in use.
The practical concern is that many commercial glass cleaners contain ammonia or other alkaline compounds, while some formulations include chlorine-based agents for streak control. Where those chemicals contact 316 stainless hardware and are not promptly rinsed away, the passive layer can be challenged—particularly at satin-finished surfaces where the texture retains liquid in micro-crevices longer than a polished surface would. This is a known formulation hazard, not a claim that all glass cleaners are incompatible with stainless. The risk is the combination of formulation type, contact time, and retention surface.
The practical control is sequencing and rinsing. Apply glass cleaner from the top down and plan for runoff reaching hardware below. If the glass cleaner formulation is not confirmed as stainless-safe, keep it off the metal fittings entirely and rinse any contact points with clean water before they dry. Do not allow glass cleaner to pool in clamp crevices or dry on threaded hardware. After completing glass cleaning, visually check clamp faces and hardware joints for residue film before considering the glass-cleaning phase complete.
A secondary problem arises when metal cleaning is done first and the surface is then contaminated by glass-cleaner runoff before the hardware is dry. The sequencing decision—metal first or glass first—should be made with the runoff path in mind. In most installed configurations, cleaning glass after hardware, followed by a final hardware rinse, reduces the risk of leaving incompatible chemistry on metal surfaces.
Completion Checks for Rinsing and Hardware Function
A cleaning session that ends when the visible surfaces look clean leaves the highest-risk failure scenario untouched. Soap residue retained in joints and crevices attracts moisture, and chloride that was in suspension during washing can concentrate at those points as the residue dries. The rinse step is not cosmetic—it is the step that removes the cleaning medium that would otherwise become the corrosion catalyst.
The completion sequence should confirm that clean water has flushed all joints, clamp gaps, and thread areas—not just open surfaces. Any foam or film visible at joints after rinsing means the flush was incomplete. After rinsing, drying with a soft cloth removes standing water that would otherwise leave deposits as it evaporates. Shadow gaps and enclosed fittings that can’t be dried by cloth should be confirmed as dry before the hardware is left unattended in sun or wind.
| Controleer item | Waarom het belangrijk is | Verificatie |
|---|---|---|
| Soap residue rinsed with clean water | Residual cleaners can attract moisture and cause staining | Flush all surfaces and joints until no visible foam or film |
| Surface dried with soft cloth | Prevents water spots and streaking that trap chloride | Wipe all accessible metal and glass, check shadow gaps for wetness |
| Inspect for physical damage (dents, scratches) | Broken surface coating allows corrosion to start | Visual scan of all exposed hardware; mark any fresh damage |
| Check cable tension | Loose cables indicate movement that can trap contaminants and stress fittings | Use 3/32” Allen wrench to adjust set screw if cables sag |
| Confirm moving and threaded parts function | Stiffness or binding signals trapped residue or early galling | Hand‑operate any adjustable parts; verify smooth thread engagement |
Physical damage inspection at the end of cleaning is the point where fresh scratches, dents from impact, or scuffs from installation work are most likely to be visible against clean surfaces. Damage that breaks the passive layer—even minor scratches—creates chloride retention points that will initiate corrosion. Any fresh damage identified during this check should be documented and addressed before the next service cycle rather than deferred until visible corrosion has already started.
Completion is not when surfaces look clean—it is when residues are rinsed, hardware is dry, and function of every threaded and moving part is confirmed.
For cable railing assemblies specifically, cable tension should be checked as part of the completion sequence. If cables have sagged since the previous service, that indicates movement under load that may have created stress at fittings or allowed debris and moisture to accumulate at cable-to-terminal interfaces. Tension adjustment at that point—using the appropriate Allen wrench on the set screw—prevents that condition from carrying into the next cleaning interval. This check applies to cable systems and should not be imported into glass-clamp hardware verification.
Marine maintenance for 316 stainless cable and glass railing hardware is not primarily a surface-cleaning task—it is a crevice-management task. Open surfaces respond to routine rinsing, but the failure scenarios that matter in coastal exposure develop in the zones a rinse never reaches: thread roots, clamp interiors, post base joints, and scratched areas where the passive layer has already been broken. The decision between in-place and disassembly cleaning should be driven by what those hidden zones show, not by a fixed schedule.
Before the next cleaning cycle, confirm the formulations being used are chloride-free and stainless-safe, establish which areas require disassembly access based on any tea staining found at concealed points, and sequence glass and metal cleaning to prevent incompatible runoff from drying on hardware joints. The real endpoint of each cleaning session is verified through rinsed surfaces, dry hardware, and confirmed function of every threaded and adjustable component—not through visual assessment of the open faces alone.
Veelgestelde vragen
Q: What if my railing hardware is 304 stainless steel instead of 316?
A: The cleaning principles still apply, but you must be more vigilant. 304 contains less molybdenum and is less resistant to chloride attack, so hidden salt deposits will trigger tea staining and pitting faster than on 316. If you’re in a marine environment, upgrading to 316 fittings like these marine-grade cable terminals reduces long-term corrosion risk. If you stay with 304, shorten inspection intervals and never skip the crevice checks this article describes.
Q: After cleaning and drying, do I need to apply a protective coating or sealant?
A: No protective coating is required. The passive chromium oxide layer reforms on its own when the surface is clean, dry, and exposed to air. Sealants, waxes, or oil-based films can trap residual moisture and chloride, creating the very conditions the cleaning aimed to eliminate. Focus instead on confirming every joint and thread is residue-free and dry.
Q: How close to the ocean must I be for this protocol to apply?
A: There is no hard distance cutoff, but ISO 9223 classifies atmospheric corrosivity by chloride deposition rate, and marine influence often extends several kilometres inland depending on surf, wind, and topography. If you are within 5 km of breaking surf, or if your hardware accumulates visible salt residue between cleanings, follow the full crevice-management protocol. Beyond that, you may scale back disassembly to times when tea staining or thread binding appears.
Q: Should I choose polished 316 hardware instead of satin to reduce cleaning effort near the sea?
A: Yes, polished 316 offers a real maintenance advantage. Its microscopically smoother surface retains far less salt than satin-finished hardware of the same grade, so routine rinsing removes more chloride. The trade-off is that polished finishes show scratches more easily and cost more. If aesthetics and budget allow, polished 316 directly addresses the retention problem satin creates.
Q: If I never find tea staining or thread binding, is disassembly cleaning really worth the labor?
A: In that case, no — the article’s trigger is evidence-based, not time-based. If you consistently find clean clamp interiors, free-moving threads, and no brown discoloration during regular inspections, in-place cleaning is sufficient. Disassembly becomes worth the effort only when those visual indicators show that salt is accumulating where rinsing cannot reach.