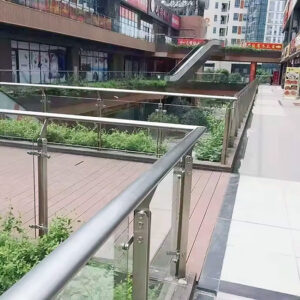
A post-mounted glass railing system’s performance hinges on the precision of its spigot installation. Even minor misalignment during this phase can lead to costly glass fabrication errors, structural non-compliance, or persistent aesthetic flaws. Professionals face the dual challenge of executing a mechanically sound assembly while navigating a complex regulatory landscape that treats glass as a custom-fitted, final component.
This process demands a methodical approach where planning and sequence are non-negotiable. The critical path is clear: post and spigot installation must be finalized before glass is measured and ordered. This article provides the authoritative, step-by-step framework to ensure your installation meets both engineering specifications and building code mandates, avoiding the common pitfalls that compromise safety and longevity.
Essential Tools and Pre-Installation Planning
Defining the Critical Path
The foundational principle for any successful installation is treating glass procurement as the final step. All scheduling and material ordering must adhere to the rule that Post Installation Precedes Glass Fabrication as Critical Path. Measuring for glass before posts are permanently placed and spigots are aligned invites measurement errors that cannot be corrected after custom panels are fabricated. This sequence protects the project from significant cost overruns and delays.
Navigating the Regulatory Framework
Before assembling any tools, confirm all local amendments to the International Building Code (IBC) and International Residential Code (IRC). Jurisdictions frequently amend baseline standards, creating a patchwork of specific requirements for railing height, glass type (e.g., laminated versus tempered), and top rail configurations. Your binding rulebook is the selected system’s ICC-ES evaluation report; deviating from its prescribed glass specs or dimensions voids the compliance pathway. This underscores how System Choice Dictates Code Compliance and Engineering Burden.
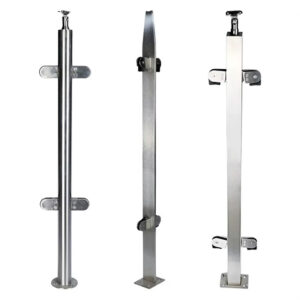
Assembling the Tool Kit
Gather essential tools to execute the installation with precision. You will need a power drill, a set of hex wrenches (typically 6mm and 4mm for spigot hardware), a long level, a tape measure, and appropriate safety gear. Having these tools on hand before beginning prevents work stoppages and ensures adjustments can be made accurately. From my experience on complex decks, a laser level is invaluable for establishing a perfect horizontal datum line across multiple posts, saving considerable time during alignment.
Pre-Installation Planning Essentials
A structured plan mitigates risk. The following table outlines the core tools and planning requirements to establish before work begins.
| Tool / Component | Specification / Requirement | Critical Purpose |
|---|---|---|
| Hex Wrenches | 6mm, 4mm sizes | Spigot assembly & adjustment |
| Minimum Railing Height | 42 inches (typical) | Universal code compliance baseline |
| System Compliance | ICC-ES Evaluation Report | Binding engineering rulebook |
| Glass Procurement | After post installation | Prevents measurement errors |
Source: IBC International Building Code Chapter 24 Glass and Glazing. This code establishes the fundamental safety requirements for glass installations, including the mandated performance criteria and safety glazing specifications that the railing system must meet, such as minimum height.
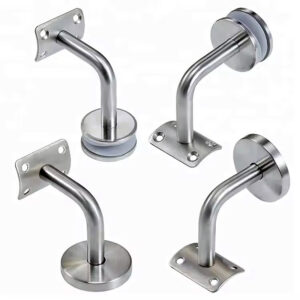
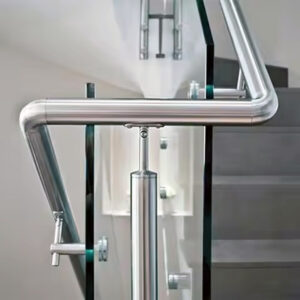
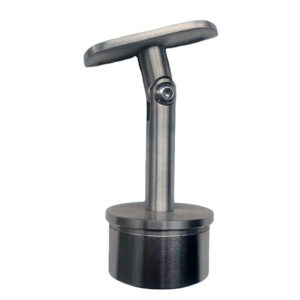
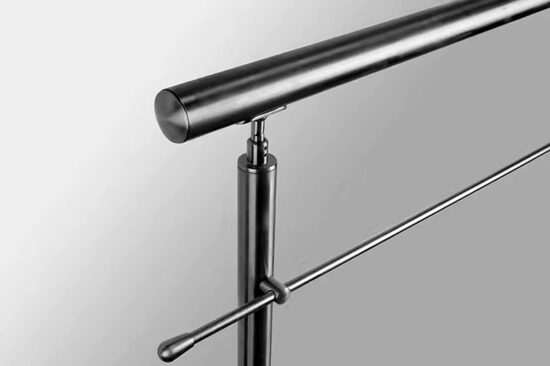
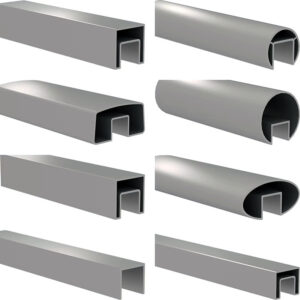
Step 1: Spigot Preparation and Initial Placement
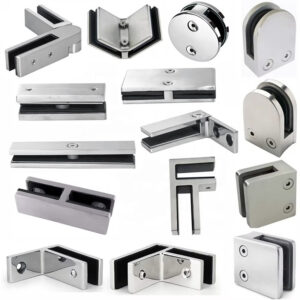
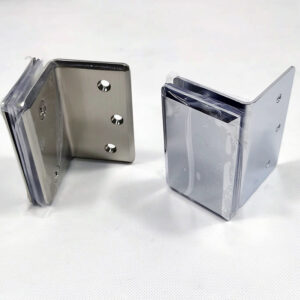
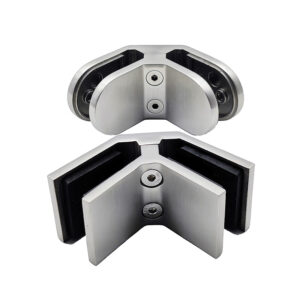
Disassembly and Gasket Installation
Begin by disassembling each spigot (glass clamp) and inserting the correct rubber or silicone gaskets specified for your glass thickness. These gaskets are critical—they cushion the glass, prevent metal-on-glass contact, and create a weatherproof seal. Verify the gasket material is compatible with your environment; UV-resistant silicone is often required for exterior applications. Omitting or installing incorrect gaskets is a primary cause of glass stress points and water infiltration.
Loose Attachment for Alignment
Place the provided mounting bolts into the spigot’s channel and loosely attach one clamp half to the post using the appropriate hex wrench. Do not tighten fully at this stage. This intentional looseness is the key to achieving perfect alignment in subsequent steps. For a single panel, attach the corresponding clamp halves to both posts. Use a level across the tops of these loosely attached clamps to establish a preliminary horizontal line. For corner posts, also check for vertical plumb and the correct angle.
The Role of Specialized Kits
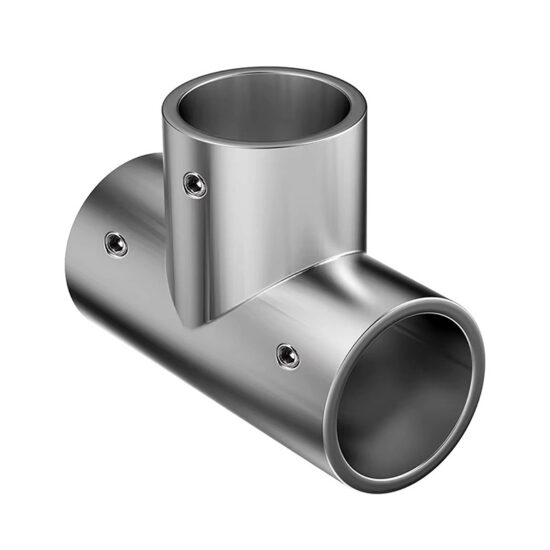
This adjustment phase highlights how manufacturers have responded to installation complexity. Many now provide Specialized Tooling and Kits that bundle all necessary components—clamps, gaskets, fasteners, and even proprietary tools—into a single package. This approach transforms a custom architectural process into a repeatable assembly task, significantly reducing the margin for error and ensuring all components are compatible.
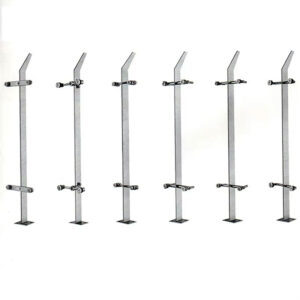
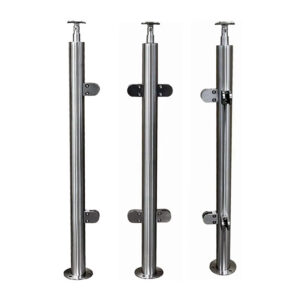
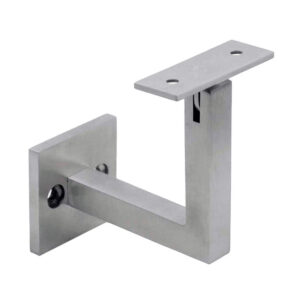
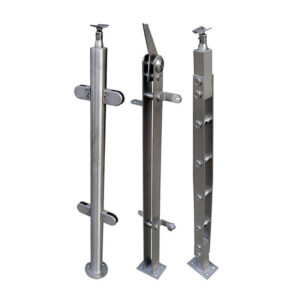
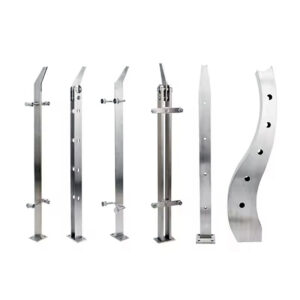
Step 2: Post Mounting and Final Spigot Alignment
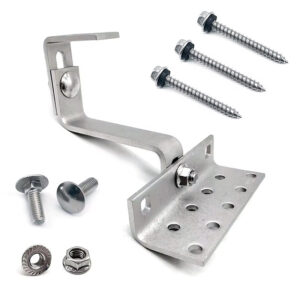
Selecting and Executing the Mounting Method
The method of attaching the post to the substrate involves a fundamental trade-off between space, aesthetics, and structural preparation. Your choice directly impacts the project’s feasibility and cost.
| Mounting Method | Key Consideration | Structural Impact |
|---|---|---|
| Surface Mounting | Maximizes deck space | Requires robust substrate |
| Fascia Mounting | Minimizes deck intrusion | Demands strong ledger board |
| Core-Drill Mounting | Most secure attachment | Significant structural preparation |
Source: ASTM F2650 Standard Specification for Glass Railing Systems and Guards. This specification provides the minimum performance requirements for the structural components of glass railing systems, including the posts and their mounting, which directly informs the selection and execution of the mounting method.
Mark drilling points through the post base, drill pilot holes or set anchors as required for your substrate, and secure the first post. Use a level on two adjacent sides to ensure it is perfectly plumb before final tightening.
Achieving Perfect Post and Spigot Alignment
With the first post secured, use a straightedge or taut string line to align subsequent posts. Secure each one only after verifying plumb and alignment with the established line. Once all posts are fixed, return to the loosely attached spigots. Re-check their height and horizontal alignment relative to each other, making micro-adjustments as needed. Only when all posts are plumb and all spigots are perfectly aligned should you perform the final, sequential tightening of all spigot hardware, following the manufacturer’s torque specification to avoid over-torquing.
Step 3: Measuring for Glass Panels Accurately
Taking the Critical Dimensions
With posts secured and spigots finally adjusted, you can now take accurate measurements for glass fabrication. Measure the exact distance between the inner faces of the installed gaskets—this is your clear opening. From this dimension, you must deduct a clearance of 1/8″ to 3/16″ in both height and width. This gap is not an oversight; it is essential to allow for thermal expansion of the glass and to provide the necessary tolerance for installation.
Specifying Hardware Integration Points
If your spigot system uses safety pins or set screws that engage holes in the glass, you must provide the fabricator with the exact diameter and center-point location for these holes. A critical rule is that the hole diameter must be at least equal to the glass thickness to prevent stress concentration. Providing a detailed diagram to the fabricator is the best practice.
| Measurement Parameter | Required Tolerance / Action | Purpose |
|---|---|---|
| Clear Opening | Measure between gaskets | Establishes baseline dimension |
| Width & Height Deduction | 1/8″ to 3/16″ clearance | Allows for thermal expansion |
| Safety Pin Hole Diameter | ≥ Glass thickness | Ensures proper hardware fit |
Source: Technical documentation and industry specifications.
Choosing Your Supply Model
This custom measurement step illustrates the industry’s two primary supply models. You are either working with an “Assembled System” from a supplier who provides a curated kit with specific glass dimensions, or you are navigating a “Component Ecosystem” where you source engineered posts and spigots separately, enabling maximum design flexibility for complex, custom applications.
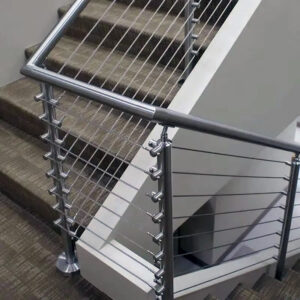
Step 4: Installing Glass and Verifying Code Compliance
Panel Installation Protocol
Upon receiving the custom-fabricated glass, install each panel with at least one helper. Carefully slide the panel into the prepared spigots, then attach the remaining clamp halves. Follow the manufacturer’s specified sequence and torque value when tightening the clamp bolts to ensure even pressure on the gaskets and glass.
Conducting the Compliance Verification
Immediately after installation, verify the system meets code. This is not a mere formality but a critical safety check. The system must pass several key tests, the performance criteria for which are established by standards like ASTM E2358 Standard Test Methods for Performance of Glass in Permanent Glass Railing Systems, Guards, and Balustrades.
| Compliance Check | Test / Requirement | Standard / Threshold |
|---|---|---|
| Minimum Height (Residential) | 36 inches | IBC/IRC baseline |
| Minimum Height (Commercial) | 42 inches | IBC/IRC baseline |
| Sphere Passage Test | 4-inch diameter sphere | Must not pass through |
| Load Resistance | 200-lb. concentrated load | Typical structural requirement |
Source: ASTM E2358 Standard Test Methods for Performance of Glass in Permanent Glass Railing Systems, Guards, and Balustrades. This standard establishes the critical performance tests for glass infill panels, including load and impact resistance, which verify the installed system meets the safety criteria referenced by building codes.
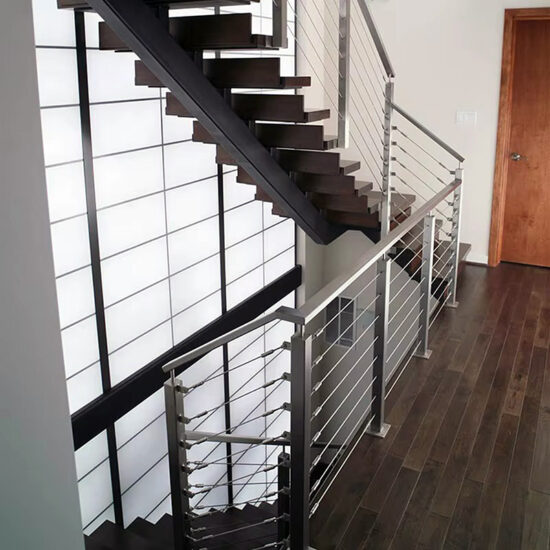
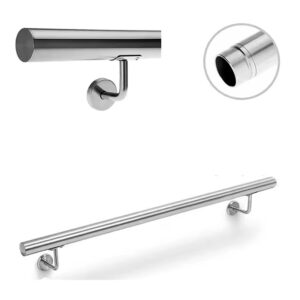
Check for a continuous top rail if required by code, which provides added lateral stability. This requirement underscores the evolution of Glass Railing from a Simple Guardrail to an Integrated Building Envelope Element, engineered to withstand wind loads and environmental exposure.
Common Spigot Installation Mistakes to Avoid
Locking in Errors and Compromising Integrity
The most consequential error is fully tightening spigots before posts are plumb and aligned. This locks in inaccuracies, making proper glass installation impossible. Another frequent mistake is over-torquing clamp bolts, which can distort the hardware and compromise the gasket’s ability to seal and cushion the glass. Always use a calibrated torque wrench or adhere strictly to the manufacturer’s “hand-tight plus a quarter-turn” guideline if a specific value isn’t provided.
Component and Substrate Failures
Using incompatible or substandard fasteners for your specific substrate (wood, concrete, steel) risks catastrophic pull-out failure under load. Similarly, omitting gaskets or using the wrong size immediately voids the weather seal and puts the glass under direct metal contact stress. These mistakes connect directly to a core material insight: Hardware Finish is a Corrosion Management Strategy, Not Just Aesthetic. Specifying 316-grade stainless steel or an AAMA 2605-rated powder coat for coastal environments is essential to prevent premature failure.
| Mistake | Consequence | Prevention Strategy |
|---|---|---|
| Omitted/incorrect gaskets | Compromised weatherproof seal | Verify gasket size/material |
| Over-torquing clamp bolts | Distorted hardware, failed seal | Follow manufacturer torque spec |
| Incompatible fasteners | Catastrophic structural failure | Match fastener to substrate |
| Tightening spigots prematurely | Locked-in misalignment | Final tighten after alignment |
Source: Technical documentation and industry specifications.
Post-Installation Inspection and Maintenance Tips
The Final Inspection Checklist
Before considering the project complete, conduct a rigorous final inspection. Check every piece of hardware for proper tightness. Apply firm hand pressure along the top of the system to check for rigidity and any noticeable racking. Ensure all drainage paths in the posts are clear of debris to prevent water accumulation, which accelerates corrosion.
Establishing a Proactive Maintenance Routine
Implement a semi-annual maintenance schedule. Inspect all spigot hardware for looseness caused by thermal cycling or substrate settling. Check rubber or silicone gaskets for signs of degradation, hardening, or compression set, and replace them as necessary. Look for any corrosion, particularly on fasteners, which are often the first point of failure. This proactive upkeep is a primary reason Professional Installer Networks are Becoming a Critical Channel and Quality Gate for manufacturers, ensuring long-term performance and mitigating liability.
Next Steps: Ordering Glass and Final Safety Check
Finalizing the Glass Order
With your precise measurements in hand, proceed to order glass from a reputable fabricator. Provide them with all dimensions, hole details, and confirm the required glass type—typically tempered for most applications, or laminated where required by code for added safety. Ensure the fabricator understands the application is for a structural railing system.
The Pre-Handover Safety Verification
Once the glass is installed, perform a final, documented safety check. Verify the completed system’s height at multiple points. Confirm the stability of the entire assembly and the security of the top rail. For complex projects, this verification benefits from the Transactional Transparency and Lead Qualification offered by detailed online project planners, which help ensure all specifications are confirmed before final client sign-off. For a comprehensive selection of engineered spigot systems and mounting hardware that comply with these rigorous steps, review the post-mounted glass railing hardware specifications.
The installation’s success is determined by respecting the sequence: plan according to code, install and align posts and spigots with precision, measure glass only after the hardware is fixed, and verify every compliance checkpoint. Prioritize the selection of a fully evaluated system and the correct corrosion-resistant finishes for your environment. These decisions directly impact the installation’s safety, durability, and aesthetic outcome.
Need professional-grade components and technical support for your next railing project? The engineered solutions and detailed resources at Esang are designed to meet these exacting standards. For specific project inquiries, you can also Contact Us.
Frequently Asked Questions
Q: How do you determine the correct glass specifications for a post-mounted railing to ensure code compliance?
A: The correct glass type and dimensions are dictated by the specific post-mounted system’s ICC-ES evaluation report, which is the binding compliance document. You must also verify local amendments to the IBC International Building Code Chapter 24 Glass and Glazing, as jurisdictions often mandate specific heights or require laminated over tempered glass. This means your procurement must treat the system manufacturer’s report as the primary rulebook, with local code review as a mandatory parallel check before ordering any materials.
Q: What is the critical sequence for installing spigots and posts to avoid measurement errors?
A: You must never fully tighten spigots until all posts are permanently mounted and perfectly plumb. Secure posts to the substrate first, using a level and string line for alignment, then make micro-adjustments to the loosely attached spigot halves to achieve perfect horizontal alignment. This precision ensures the final measurement between gaskets is accurate. For projects using custom-fitted glass, this sequential discipline is the critical path that prevents costly fabrication errors and rework.
Q: When measuring for custom glass panels, what clearances and hole details are required?
A: Measure the exact clear opening between the inner faces of the installed gaskets, then deduct a standard 1/8″ to 3/16″ clearance in both height and width for thermal expansion. If the spigot system uses safety pins, you must provide the fabricator with the exact diameter and location for holes, where the hole diameter must be at least equal to the glass thickness. This means your fabrication drawings depend entirely on the as-built post and spigot placement, not on design plans.
Q: Which standards define the structural performance requirements for the glass and posts in these systems?
A: The glass infill panels must meet the performance criteria in ASTM E2358 Standard Test Methods for Performance of Glass in Permanent Glass Railing Systems, Guards, and Balustrades. The overall system, including posts and their attachment, must comply with ASTM F2650 Standard Specification for Glass Railing Systems and Guards. This means specifying a system with valid ICC-ES reports referencing these standards is non-negotiable for meeting the required 200-lb. load resistance and ensuring occupant safety.
Q: How does the choice between a pre-engineered kit and a component ecosystem impact the installation process?
A: Pre-engineered kits bundle specialized components and tools, simplifying measurement and assembly into a repeatable task ideal for standard applications. A component ecosystem offers maximum flexibility for complex, custom architectural work but requires more detailed engineering and precise field measurement. This means your project’s complexity and tolerance for on-site adjustment should drive the initial supplier selection, as switching models mid-project is often impractical.
Q: What are the key post-installation inspection points and maintenance routines for long-term performance?
A: Conduct a final inspection checking all hardware torque, system rigidity, and that the top rail (if required) is secure. Establish a semi-annual routine to inspect for loose hardware, check spigot gasket condition, clear post drainage paths, and look for fastener corrosion. This proactive maintenance is a corrosion management strategy critical for coastal or harsh environments, where specifying the correct stainless-steel grade or AAMA 2605-rated finish during procurement pays long-term dividends.
Q: Why is the mounting method for posts considered a fundamental trade-off, and how does it affect planning?
A: The choice between surface, fascia, or core-drill mounting directly trades off deck space usage against structural preparation and labor intensity. Each method has different implications for the substrate’s strength and the visibility of hardware. For projects with space constraints or complex deck edges, this decision must be made early, as it influences post selection, structural reinforcement needs, and the overall installation timeline.