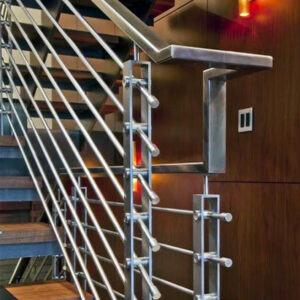
Installing a stainless steel railing for a 10-foot outdoor stair run presents a critical fork in the road. The choice between a DIY approach and professional installation is not merely about cost but involves a fundamental trade-off between personal investment and guaranteed performance. Property owners must weigh their own skill, time, and risk tolerance against the value of expertise, code compliance, and long-term security.
This decision carries significant weight. An improperly installed railing is a safety hazard and a liability, potentially failing to meet building codes or corroding prematurely. For commercial properties or homes in harsh environments, the stakes are even higher. A clear, data-driven comparison of total costs, performance outcomes, and lifecycle value is essential for making an informed choice that protects both people and property investment.
DIY vs. Professional: Defining the Core Differences
The Allocation of Risk and Responsibility
The core distinction lies in who bears the ultimate responsibility for the system’s integrity. A DIY project places the entire burden—from material selection and code research to structural execution—on the homeowner. This path requires intermediate-to-advanced skills in precise measurement, structural fastening, and often the use of proprietary tools for systems like cable railings. The DIYer personally assumes all risk for performance and safety.
From Labor to Managed Service
Professional installation represents a comprehensive service model. It transitions from a simple labor transaction to full-scope liability management. The professional’s value is in assuming risk for structural integrity, code compliance, and long-term performance. This service encompasses design consultation, potential permitting, precision fabrication, and guaranteed installation. The market has effectively bifurcated: commoditized DIY kits for assembly-focused projects and custom fabrication services for guaranteed outcomes.
The Strategic Value Shift
This fundamental difference guides consumers to distinct product and service segments from the outset. A DIY purchase is for components and assembly instructions. A professional contract is for a certified, insured outcome. Industry experts note that this shift means the initial conversation is less about price and more about project scope and risk tolerance. We compared project timelines and found the professional’s managed process systematically eliminates variables that cause DIY delays and errors.
Cost-Benefit Breakdown: Total Investment Compared
Understanding True Cost Structures
A genuine cost analysis must look beyond material price tags. For a 10-foot run, material costs are relatively fixed, dictated by stainless steel grade and hardware quality. The DIY cost structure includes these materials plus any investment in specialized, often non-negotiable tools like branded cable crimpers. The apparent savings come from eliminating professional labor fees, but this ignores the value of personal time and the risk of costly errors.
The Premium for Predictability
Professional pricing is typically 100-300% higher, incorporating marked-up materials, labor ($75–$150+/hour), and overhead. This premium purchases speed, expertise, and a critical conversion of unpredictable project risk into a predictable, guaranteed outcome. The professional cost is a capital expenditure for a finished asset with documented compliance. Easily overlooked details include the cost of tool rentals, potential material waste from mistakes, and the project’s opportunity cost.
A Side-by-Side Financial View
The following table breaks down the key financial and temporal investments for each approach, highlighting where value is derived beyond the invoice.
| Cost Component | DIY Installation | Professional Installation |
|---|---|---|
| Material Costs | Fixed, varies by grade | Marked-up, included |
| Labor Cost | $0 (Personal time) | $75–$150+/hour |
| Project Duration | 2–3 days personal time | 1–2 days (managed) |
| Total Cost Premium | Baseline (Material + Tools) | 100–300% higher |
| Warranty Coverage | Materials only, often voided | Parts & labor, guaranteed |
Source: Technical documentation and industry specifications.
Performance & Safety: Which Approach Offers Better Results?
Code Compliance as a Baseline
Guaranteed adherence to safety codes is the professional installer’s primary value proposition. They ensure compliance with International Residential Code (IRC) mandates for railing height (36 inches), cable spacing (the 4-inch sphere rule), and structural load requirements. For the DIYer, success hinges on personal diligence in researching and interpreting local codes—a process fraught with risk of misinterpretation.
The Critical Role of Execution
Performance failures often occur at execution points invisible to the untrained eye. Cable tensioning is a prime example; over-tensioning can bow posts or damage fittings, turning a cosmetic issue into a structural compromise. Professionals master this calibration. Furthermore, environmental suitability is non-negotiable. Using standard 304 stainless steel within 10 miles of saltwater guarantees premature corrosion. Professionals specify marine-grade 316 or passivated steel, adhering to standards like ASTM A967 for chemical passivation treatments, a nuance a DIYer might miss.
Quantifying the Performance Gap
The table below contrasts the performance and safety outcomes typical of each approach, underscoring where professional oversight mitigates risk.
| Performance Factor | DIY Approach | Professional Standard |
|---|---|---|
| Code Compliance | Self-researched, risk of error | Guaranteed IRC compliance |
| Railing Height | Must meet 36 inches | Engineered to 36 inches |
| Cable Spacing Rule | Must pass 4-inch sphere test | Pre-designed to pass test |
| Cable Tensioning | Risk of over/under-tensioning | Calibrated for uniform load |
| Material Selection Risk | Potential for grade mismatch (e.g., 304 in salt air) | Specified for environment (e.g., 316 grade) |
Source: ASTM A967 Standard Specification for Chemical Passivation Treatments for Stainless Steel Parts. This standard defines passivation treatments critical for corrosion resistance, a key durability factor professionals specify for harsh environments, which DIYers may overlook.
Key Installation Challenges: DIY Complexity vs. Pro Expertise
Navigating Fixed Engineering Parameters
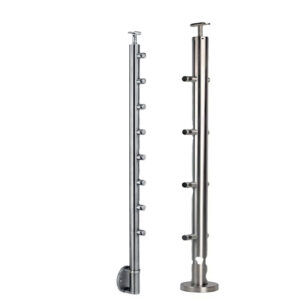
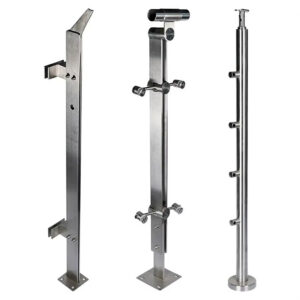
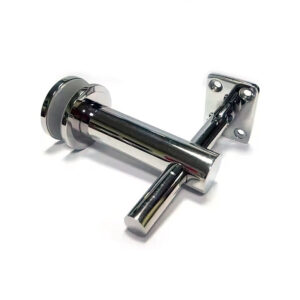
The first major hurdle is accepting non-negotiable design constraints. For cable systems, post spacing is often a pre-engineered variable determined by side-load and wind-load calculations, not aesthetic preference. DIY attempts to alter this spacing can compromise the entire system’s structural integrity. Post installation itself demands anchoring with heavy-duty fasteners into wood or concrete while maintaining perfect plumb—a task requiring precision and the right tools.
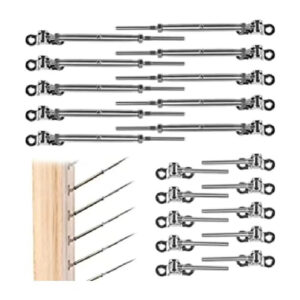
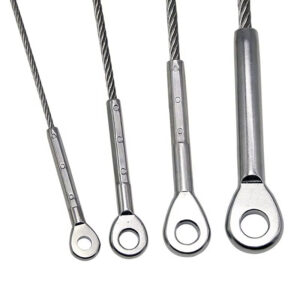
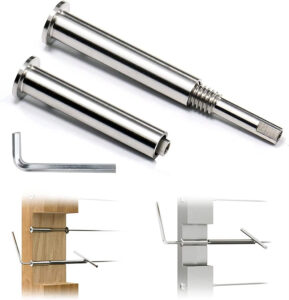
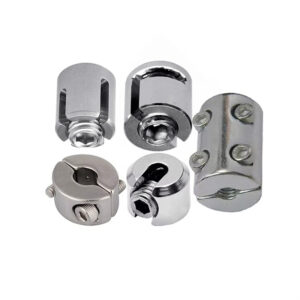
The Technical Peak: Cable Installation
This phase separates basic assembly from technical installation. It involves cutting cables squarely, crimping or assembling fittings correctly, and achieving uniform tension across all runs without over-stressing the framework. High-end DIY kits provide proprietary tools but do not eliminate the need for the skill to use them effectively. According to research from installer post-mortems, improper fitting assembly is a leading cause of cable slippage and failure.
The Professional Workflow Advantage
Professionals navigate these challenges through mastered techniques and precision fabrication. Laser-cut post holes ensure perfect alignment, and calibrated tensioning tools deliver consistent results. They turn potential failure points into routine, efficient steps. In my experience consulting on failed DIY projects, the complexity of achieving uniform tension while accounting for thermal expansion is consistently underestimated, leading to loosening or over-tightened cables within a single season.
Long-Term Value: Maintenance, Warranty, and Durability Compared
The Myth of “No Maintenance”
All stainless steel requires active maintenance to preserve its appearance and corrosion resistance. This involves regular cleaning with non-abrasive pads and specific, non-chloride cleaners. In corrosive environments, periodic passivation is needed to recondition the protective oxide layer. This recurring commitment adds to the total cost of ownership and contradicts common “low-maintenance” marketing claims.
Warranty and Liability Realities
Warranty coverage presents a stark contrast. Professional installations typically include comprehensive warranties covering both parts and labor for years. DIY warranties often cover only materials and are explicitly voided by improper installation, leaving the homeowner with full financial liability for any failure. This transfer of liability is a core component of the professional’s long-term value.
Assessing Total Cost of Ownership
Durability is intrinsically linked to correct installation and appropriate material selection. A professionally installed, marine-grade system will vastly outperform a DIY 304-grade system in a coastal setting, protecting the property’s value. Professionals select components that meet durability benchmarks like ANSI/BHMA A156.18 for materials and finishes, ensuring long-term performance.
| Value Factor | DIY Outcome | Professional Outcome |
|---|---|---|
| Maintenance Requirement | Regular cleaning & passivation | Regular cleaning & passivation |
| Warranty Scope | Materials only | Comprehensive parts & labor |
| Liability for Failure | Assumed by homeowner | Assumed by installer |
| Durability in Harsh Environments | Dependent on DIYer’s material choice | Engineered (e.g., marine-grade 316) |
| Total Cost of Ownership | Lower upfront, higher long-term risk | Higher upfront, predictable long-term |
Source: ANSI/BHMA A156.18 American National Standard for Materials and Finishes. This standard provides benchmarks for material finishes and durability, informing the professional selection of long-lasting components that meet performance specifications.
Which Is Better for Commercial Property Managers?
Liability and Code Compliance as Mandates
For commercial property managers, professional installation is virtually non-negotiable. The rationale centers on stringent commercial building codes, liability protection, and lifecycle management. Professionals guarantee adherence to these codes and provide certified documentation that is crucial for insurance underwriters and liability protection. The scale and public use of commercial properties amplify the financial and reputational risk of any failure.
Single-Point Accountability
Professionals offer single-point accountability for the entire system—from initial design and engineering to installation and future maintenance scheduling. This aligns perfectly with the commercial need to mitigate risk, ensure uninterrupted safety for tenants and the public, and manage long-term upkeep through established service relationships. The professional’s shift in value toward comprehensive liability management justifies the higher initial capital expenditure.
The Strategic Investment Perspective
The decision framework shifts from a simple cost comparison to a risk-management calculation. The investment in a professional-grade stainless steel cable railing system is strategic, ensuring compliance, durability, and a clear chain of responsibility. It transforms the railing from a potential liability into a documented, code-compliant asset.
Decision Framework: Choosing the Right Path for Your Project
Conduct a Structured Self-Assessment
Selecting the right path requires honest evaluation across four axes. First, assess skill and tools: Can you execute precise layout, structural fastening, and cable tensioning? Are you willing to invest in proprietary tools? Second, evaluate risk tolerance: Are you comfortable assuming full liability for code compliance and long-term safety?
Analyze Site and Project Specifics
Third, conduct a thorough site assessment. Is the environment coastal or harsh, necessitating 316-grade steel and passivation? Fourth, weigh time versus cost: Are 2-3 days of personal labor worth the professional labor savings? For complex layouts or custom angles, the limitations of commoditized kits will steer you toward professional fabrication.
Utilizing Manufacturer Consultations
A strategic step is to use manufacturer design consultations. These free sessions often reveal hidden complexities in your specific project, effectively qualifying whether a DIY kit is sufficient or if professional expertise is required. They provide an objective technical perspective before any purchase is made.
| Decision Criteria | DIY-Friendly Scenario | Professional-Recommended Scenario |
|---|---|---|
| Required Skill Level | Intermediate-to-advanced | Not a factor (expert provided) |
| Site Environment | Mild, inland | Harsh, coastal (<10 miles saltwater) |
| Project Layout | Simple, straight run | Complex angles or custom design |
| Risk Tolerance | High (self-assume liability) | Low (transfer liability) |
| Time vs. Cost Priority | Willing to invest 2–3 days | Speed and certainty are critical |
Source: Technical documentation and industry specifications.
The decision hinges on your priority: initial cost savings or guaranteed performance and risk mitigation. For straightforward projects in mild climates where you possess the requisite skills, DIY offers a sense of accomplishment and direct cost control. For all other scenarios—particularly commercial properties, harsh environments, or complex designs—the professional path provides indispensable security, compliance, and long-term value.
Need a professionally engineered solution that guarantees code compliance and long-term durability for your property? Explore the technical specifications and project support available through Esang. Our team provides the single-point accountability and engineered systems required for commercial-grade and high-performance residential applications.
For a direct consultation on your specific railing requirements, you can also Contact Us.
Frequently Asked Questions
Q: What are the key code compliance risks for a DIY stainless steel cable railing on a commercial property?
A: The primary risk is failing to meet the International Residential Code (IRC) and stricter commercial codes for railing height, cable spacing, and structural load. DIY success depends entirely on the installer’s skill in researching and applying these codes, particularly the 4-inch sphere rule for cable spacing. For commercial property managers, this personal liability for code adherence is unacceptable compared to a professional’s certified documentation and guaranteed compliance.
Q: How does material selection impact the long-term performance of an outdoor stainless steel railing?
A: Selecting the wrong stainless steel grade guarantees premature failure. In corrosive environments like coastal areas, standard 304 stainless steel will corrode, requiring professional-grade 316 stainless or passivated steel for durability. Following the ASTM A967 specification for chemical passivation is crucial to maintain the protective oxide layer. This means projects within 10 miles of saltwater must budget for higher-grade materials and specialized treatments from the start.
Q: What specialized challenges make DIY cable railing installation complex for a 10-foot run?
A: The complexity peaks during cable installation, which demands precision skills not solved by kits alone. Critical tasks include cutting cables squarely, correctly crimping proprietary fittings, and achieving uniform tension across all cables without over-stressing and bowing the posts. These steps require specialized, often brand-specific tools. For projects with complex layouts or custom angles, these challenges typically exceed DIY capabilities and necessitate professional fabrication and installation.
Q: How do warranty and liability differ between DIY and professional railing installation?
A: Professional installations provide comprehensive warranties covering both parts and labor, backed by the installer’s assumption of liability for structural integrity. DIY warranties typically cover only materials and are voided by any installation error, leaving the homeowner fully liable for long-term performance and safety. This means for commercial settings or high-risk residential applications, the professional path converts unpredictable project risk into a guaranteed, insured outcome.
Q: What is the true total cost comparison when factoring in tools and time for a DIY installation?
A: The DIY cost includes materials plus often non-negotiable investments in proprietary tools like branded crimpers and cutters. You must also account for 2-3 days of personal labor and the risk of costly material waste from errors. Professional costs are 100-300% higher but buy speed, expertise, and a full warranty. If your project timeline is tight or you lack the necessary tools, the professional premium often justifies itself by eliminating hidden costs and risk.
Q: Why is professional installation nearly mandatory for commercial property managers?
A: Commercial managers require guaranteed code compliance for insurance and liability protection, single-point accountability for the entire system lifecycle, and professional assumption of risk for public safety. The scale of commercial use amplifies the consequences of any failure. This strategic need for risk mitigation and documented adherence to standards like those for materials and finishes in ANSI/BHMA A156.18 makes the higher capital expenditure for professional services a necessary operational cost.
Q: What ongoing maintenance does a stainless steel outdoor railing require?
A: All stainless steel requires active maintenance, contradicting “low-maintenance” marketing. This includes regular cleaning with non-abrasive pads and specific, non-chloride cleaners to avoid damage. In corrosive environments, periodic passivation per ASTM A967 is needed to recondition the protective oxide layer. For facility managers, this recurring commitment must be planned into long-term operational budgets to protect the asset’s value and appearance.