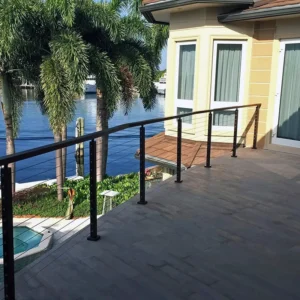
Deck surface-mount handrail waterproofing succeeds or fails at one drawing: a single section through the deck that shows the structural slab or framing, the finish build-up, the waterproofing layer and the post penetration together. Until that section exists, you cannot tell whether the base plate is bearing on the structure or on a finish layer, and you cannot tell whether the anchors pass through a membrane that someone must terminate and protect. The conditions that change the answer are concrete and lookupable: whether the deck is waterproofed at all, the thickness and type of the build-up between the finish surface and the structural bearing plane, the fall and the location of outlets or door thresholds, and whether the fixing and the membrane are installed by the same trade. A dry, unwaterproofed deck removes the envelope interface entirely and leaves only the structural question.
Map the deck build-up and structural bearing plane
Draw the structural deck, every finish layer above it, the waterproofing layer and the post penetration in one section before you choose the final base arrangement. The visible deck surface and the structural bearing plane are frequently different planes, separated by insulation, screed, a drainage layer, pedestals or timber battens, and the base plate has to be resolved against the second one, not the first. The same section is where the water-management interface becomes visible, because the anchor passes through the layer that is meant to be continuous.
The practical consequence is that a surface-mount base fixed into a topping or a pedestal-supported paver is not carrying guard load into the structure in any defined way. You need to know what the base actually bears on, what the anchor embeds into, and how much material lies between. If the build-up is deep, the realistic arrangements are a thickened or packed-down support that reaches the structure, a base plate on a sleeper or curb that is itself anchored to the structure, or a side-mounted or fascia-mounted alternative. Each of those is a different penetration and a different set of edge distances.
Guard loads and their transfer into the structure are the project engineer’s call. ASTM E985-24 covers permanent metal railing systems and rails for buildings, including basic design and load and deflection criteria, but it excludes ballasted systems, and the field-specific criteria for a particular deck stay with the project. Your job in the section drawing is to show the engineer what is physically there, so that the anchorage review is run against the real build-up rather than against an assumed slab.
Where the deck has no waterproofing membrane — an open timber deck over ventilated framing, for example — the envelope scope changes and most of what follows narrows to the structural question and to keeping standing water off the base. That is a different detail, not a simplified version of the same one.
Coordinate membrane penetrations with the anchor layout
If top-mounted bases will penetrate the deck membrane, ask the envelope designer or the waterproofing contractor for the applicable termination and protection detail, and then coordinate it with the anchor layout rather than the other way round. Membrane terminations usually need a defined upstand, a collar or sleeve, a bonded flange, or a cone and clamp arrangement, and each of those occupies a footprint around the penetration. Once you know that footprint, you can see whether the anchor bolt circle fits inside it, whether the plate covers it, and whether the installer can reach the fixing after the membrane is closed.
A bead of sealant around the exposed base plate is not a membrane termination. It conceals the interface without defining what happens below the plate, and it leaves the installation sequence open — which is the part that determines whether the detail can be built at all. The question the detail must answer is what the membrane does at the penetration, in what order the work happens, and what remains accessible for inspection.
An alternative that avoids the membrane is a legitimate answer and often the simpler one: fixing to the fascia or edge beam below the waterproofing line, mounting into a curb or upstand that the membrane dresses over, or anchoring to the structure before the waterproofing is applied so the installer builds the penetration into their own work. None of these removes the need for a complete interface review. Side-mounted and fascia-mounted posts move the load into the edge of the structure and introduce their own edge-distance and anchorage questions, and a curb mount shifts the detail to how the membrane turns up and terminates on the curb.
Practically, the anchor layout and the termination detail have to be fixed together. If the number, size and spacing of anchors change after the waterproofing detail is agreed, the termination footprint changes with them, and a layout that fit the collar no longer does.
Keep base details clear of drainage paths
Mark the fall direction, the outlets and any door thresholds on the base layout, then check each base position against them before fixing anything. A mounting detail can be structurally workable and still create a trapped low point against the upslope side of a plate, bury a drainage channel under a post, or sit close enough to an outlet that the grating can no longer be lifted for cleaning. These are location checks, and they are cheap to run on paper and expensive to discover after the finishes are laid.
Three features deserve direct attention. A fall means water arrives at the base from one side, so anything that stands proud across the flow line — a plate edge, a trim cover skirt, a leveling shim pack — becomes a small dam unless the detail lets water pass or diverts it. An outlet or channel needs clear access for rodding and for lifting a grate, which a post, a cover plate or a handrail bracket can obstruct even when the post itself sits a short distance away. A door threshold has its own drainage and clearance requirement and is usually the tightest place on the deck, so a base that extends into the threshold zone can defeat the threshold drainage even if it meets the guard layout.
The project designer sets the drainage requirements, including the falls, the outlet positions and the acceptable water paths. What you contribute is the physical footprint of the base, the cover and any leveling arrangement, drawn in plan on the same layout as the drainage features, so that any clash is a drawing-stage change rather than a site improvisation.
Level the posts without losing support or drainage
On a sloping deck, resolve how the base bears and how it is leveled as a structural question first, and treat the trim cover as appearance only. A post has to stand plumb while the deck surface falls beneath it, which means something has to take up the wedge between the underside of the base and the finished surface — and that something is part of the load path. Tilting a base or packing it with loose shims solves the alignment and replaces it with a connection nobody has defined: variable bearing, uneven bolt tension, and a bending demand on the plate that was not part of the anchor calculation.
The defined options are a machined or fabricated tapered packer matched to the fall, a site-welded or shop-fabricated sloped base, a leveling arrangement with full bearing under the plate such as a grouted or non-shrink bedded base, or a proprietary adjustable base assembly. If you use an accepted adjustable assembly, it has to stay within its documented adjustment range; an assembly worked past its stated limit is no longer the component that was accepted.
Keep the drainage path visible in the same detail while you resolve this. A leveling pack, a grout bed or an adjustable collar all add height and footprint at exactly the place where water is already running, and a grout bed in particular can seal a path that the designer intended to remain open. Show the leveling arrangement and the water path in the same section, so you can see whether the packing arrangement creates a step across the fall or a pocket on the upslope side.
Whether a particular leveling arrangement is acceptable for the anchorage is decided by the project’s approved procedure and its designated approver, not at the point of installation. What you prepare for that decision is the slope across the base footprint, the resulting packer thickness range, and the bearing area the arrangement delivers under the plate.
Assign concealed-interface work and procurement information
| Review area | Information to show | Decision to settle |
|---|---|---|
| Deck and structural support | Mount location, deck build-up, structural substrate and bearing plane; defined leveling arrangement | Where the base bears and how the post remains plumb |
| Membrane and fixings | Post penetration, anchor layout, and applicable membrane termination and protection detail | How the fixing and waterproofing interfaces fit together |
| Drenaje | Fall, outlet and threshold locations relative to the plate, cover and leveling detail | Whether the base detail interrupts the intended water path |
| Concealed work and scope | Responsibility for penetration preparation, fixing installation, membrane closure and inspection; required inspection evidence | Who performs and checks each interface before it is concealed, and where manufactured hardware scope ends and membrane or site work begins |
Agree in writing, before work starts, who prepares the penetration, who installs the fixing, who closes the membrane and who inspects the concealed interface. Fixings and waterproofing are commonly separate trades that need access at different stages, and an unassigned junction is almost always closed before anyone inspects it. Each stage has one point at which the work is still visible — the drilled or formed penetration before the anchor goes in, the anchor before the membrane is dressed, the membrane termination before the plate or cover is fitted — and the agreement has to name a party and a hold point for each. The project-specific release plan governs the actual order, so the assignment is written to fit that sequence rather than to impose a new one.
Decide at the same time what evidence gets captured. Anchors, base-plate bearing, weld details where used, and the as-built position against site tolerances all become inaccessible once the deck finishes and the membrane protection go on, so the records have to be planned before the first base is fixed rather than reconstructed afterwards. A photograph of an open penetration with a position reference is worth more than a signature on a closed deck.
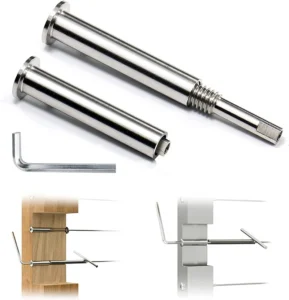
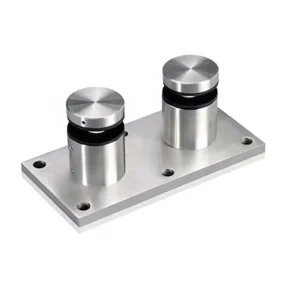
When the detail is issued for procurement, it should carry the mount location, the deck build-up, the structural substrate and bearing plane, the drainage features, the ownership of each interface and the required inspection evidence. With those present, a supplier can separate manufactured hardware scope — posts, base plates, brackets, covers and fixings in the specified stainless grade and finish — from membrane work and site work, instead of assuming a generic sealed base will satisfy the deck design. ESANG quotes deck surface handrail assemblies against that information, and the scope boundary is clearer when the drawing already shows where the hardware stops. A metal-railing specification framework such as UFGS 05 52 00 is one example of how specification and submittal structure can be organized for project-specific editing; it is not a universal code and not a product requirement.
Have the deck section, the base layout marked with falls, outlets and thresholds, the structural substrate and its edge conditions, the stainless-steel grade and finish for the exposure, the slope across each base footprint, and the agreed interface responsibilities ready before the anchor review or the quotation. An interface that is unassigned at that point is the one that will be found closed and unchecked.
Preguntas frecuentes
P: Does this guidance apply to a dry deck with no waterproofing membrane?
A: The membrane-termination work has a different scope on a dry, unwaterproofed deck. Identify the actual deck layers first, then retain the relevant structural support, post alignment and drainage checks rather than specifying a membrane interface the project does not have.
P: Is a seal around the exposed base plate enough to approve a membrane penetration?
A: No. A perimeter bead does not define how the concealed membrane meets the penetration or how that junction is protected. Approval needs the applicable membrane detail coordinated with the fixing layout and the work that must be inspected before concealment.
P: Should I choose a different mounting position simply to avoid penetrating the membrane?
A: Avoiding the membrane is a reason to compare mounting arrangements, but it does not complete the interface review. Check the alternative’s structural bearing, connection arrangement and relationship to the deck’s water path before selecting it; removing one penetration does not settle those other decisions.
P: Can a hardware quotation be treated as confirmation that the deck waterproofing detail is complete?
A: No. Manufactured handrail hardware and membrane or site work can belong to different scopes. Check what the quotation includes against the coordinated deck detail, and identify who owns each remaining penetration, membrane closure and concealed inspection before releasing that work.